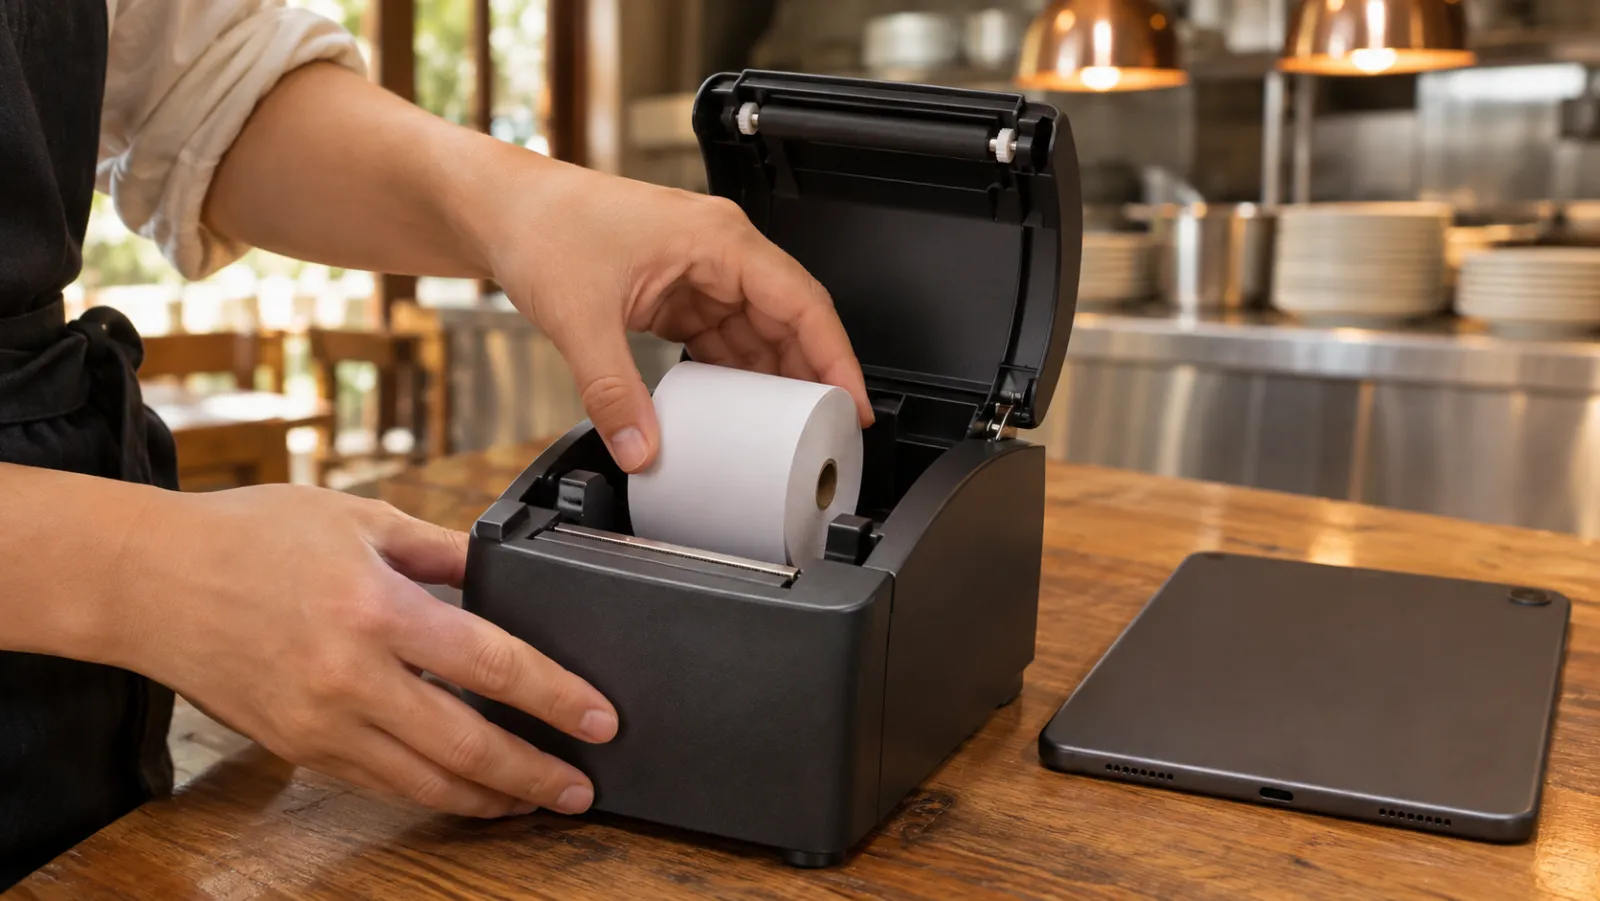
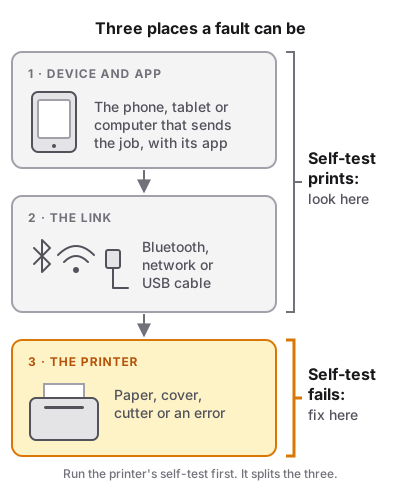
When a receipt printer stops printing, the fault is almost always in one of three places: the printer itself (paper, cover, an error), the link between the printer and the device sending to it (Bluetooth, the network or a USB cable), or what that device sends. Fixing it fast is a matter of finding which of the three it is before you start changing settings.
The test that splits them is the self-test. If the printer prints its own test page, the printer is fine and the problem is the connection or the app. If it does not, nothing on the tablet will help until the printer is fixed.
This guide starts with that check, then fixes each connection, Bluetooth most of all because it drops most often. Still choosing a printer? Start with the receipt printer buying guide.
The 60-second check
Run this before anything else. It catches most mid-service failures.
- Power. Is the power light on? Is the power switch fully on and the cable seated at both ends?
- Paper. Is there paper, and is the roll the right way round? A roll in backwards prints blank paper.
- Cover. Press the roll cover shut until it clicks. An open cover stops printing.
- Lights. Is the error light on or flashing? See the next section for what that means.
- Self-test. Print the printer’s own test page. If that works, the printer is not the problem.
- The device. Is the phone, tablet or computer that sends the job awake, with the app open, and on the same connection it used yesterday?
Symptom finder
| What you see | Most likely cause | Go to |
|---|---|---|
| No lights at all | Power or the switch | The 60-second check |
| Error light on, nothing prints | Cover open, paper out, cutter jam or heat | Paper, cover and cutter errors |
| Self-test prints, orders do not | Connection or app setup | Bluetooth, network or USB |
| Worked yesterday, nothing today (WiFi or Ethernet) | The printer got a new IP address | Network printers |
| Prints sometimes, drops mid-service (Bluetooth) | Range, sleep or a second device | Bluetooth drops |
| Paper comes out blank | Roll in backwards, or not thermal paper | Blank, faded or garbled |
| Faint or patchy print | Density setting, dirty head, old paper | Blank, faded or garbled |
| Strange symbols or pages of code | Wrong printer language or character set | Blank, faded or garbled |
Read the lights and run a self-test
Every receipt printer has a few status lights, and the manual has a table of what each pattern means. The exact patterns differ by model. Using one common model, the Epson TM-T20III, as an example:
| Light | What it tells you |
|---|---|
| Power on, error off | Online and ready |
| Error on, then off after a moment | Starting up after power-on; normal |
| Error on and paper on | Out of paper |
| Error on, paper off, not printing | Roll cover open |
| Error flashing (network models) | The network link is down |
| Paper flashing | A self-test is waiting for you to press Feed |
Source: Epson TM-T20III Technical Reference Guide.
The printer also goes offline by itself while the cover is open, while you feed paper with the Feed button, while a self-test runs, and after paper runs out. Jobs sent in those moments may be lost, so after fixing anything, resend the order.
How to run a self-test
On most receipt printers you hold the Feed button while switching the printer on. On the Epson example:
- Close the roll cover.
- Hold Feed and switch the printer on. Keep holding until it starts printing.
- It prints its current settings, then waits. Press Feed briefly to print the rest of the test.
Keep the self-test page: it shows the model, firmware and which connections this unit actually has.
If the self-test prints well, the print head, paper and cutter work. Move on to the connection. If it does not print, or prints badly, fix the printer first: the paper and error sections below cover the usual causes.
Connect a Bluetooth printer, step by step
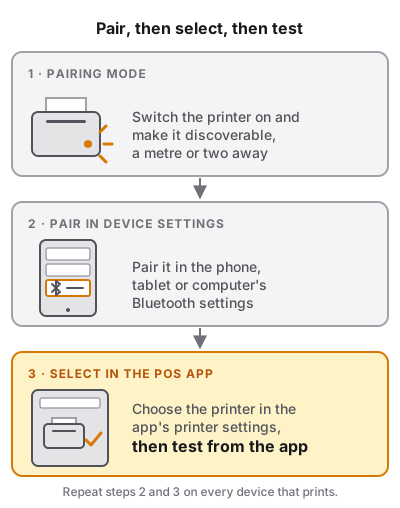
Bluetooth setup has two halves, and most failures come from doing only one of them. First the phone, tablet or computer pairs with the printer. Then your POS app selects that paired printer in its own printer settings. Some apps find the printer from inside the app instead, so read your POS app’s help page for which way it works.
1. Put the printer in pairing mode
Switch the printer on and make it discoverable. How depends on the model: some are discoverable whenever they are on, others need a button held or show a flashing Bluetooth light while they wait. The printer’s quick-start sheet says which. Keep it within a metre or two of the device while you pair.
2. Pair it on the device
- iPhone or iPad: Settings, then Bluetooth, turn it on, and tap the printer’s name under the list of devices when it appears. If it never appears, Apple’s own advice is to check the accessory’s manual for how to make it discoverable.
- Android: swipe down, touch and hold the Bluetooth icon, tap Pair new device, then tap the printer’s name.
- Windows 11: Start, Settings, Bluetooth & devices, then Printers & scanners, and Add device next to the printer once Windows finds it. It can take a few minutes.
If the device asks for a PIN and the printer’s sheet does not give one, Google suggests trying 0000 or 1234, the common defaults.
3. Select it in your POS app
Open the app’s printer settings, pick the paired printer from its list, and save. Then print a test from the app, not from the phone’s settings. A test that prints from the app proves the whole path: device, Bluetooth link and app.
4. Repeat on every device that prints
A Bluetooth printer is paired with a device, not with your venue. A second tablet or a waiter’s phone has to pair as well, and some printers keep only one connection open at a time. Decide which device owns the printer, and pair the others only if your software needs them to.
When Bluetooth will not pair or keeps dropping
It will not pair, or the app cannot see it
- It is still connected to another device. The old tablet in the office may be holding the link. Turn Bluetooth off on every other device that has paired with it, then try again.
- Forget it and pair again. On the device, open Bluetooth settings, find the printer and choose Forget. On iPhone and iPad, forgetting a device removes it on every device signed in to the same Apple Account. Then put the printer back in pairing mode and pair from scratch. This clears most “paired but will not print” states.
- The device is in airplane mode. Airplane mode turns Bluetooth off on Android.
- The app does not support this kind of Bluetooth. There are two Bluetooth radios, Classic and Low Energy, which the Bluetooth standards body describes as separate radio options. A printer that uses one will not be reached by an app that only speaks the other. If the device pairs but the app never lists the printer, check which one your printer uses against your POS’s list.
- It is an iPad and the printer is not made for one. Plenty of cheap Bluetooth printers work with Android and Windows and not with iPhone or iPad. The buying guide covers how to check before you buy.
It works, then drops mid-service
- Distance and what is in the way. The Bluetooth standards body notes that walls and barriers of glass, wood, metal or concrete weaken the signal, and that humidity does too. A steel counter, a walk-in door or a fridge between the tablet and the printer is enough. Keep the two in sight of each other, and closer than you think you need.
- The device sleeps. When a tablet locks its screen, the app sending the jobs may stop running. Set the till tablet’s auto-lock to a long time or never, and keep it on a charger.
- The printer sleeps. Many battery printers switch themselves off after a quiet spell. Check the manual for an auto power-off setting, and leave mains-powered printers plugged in.
- The device walked away. If the paired phone leaves in a server’s pocket, the printer loses it. Pair with a device that stays put, or use a network printer where several people print.
If a Bluetooth printer still drops after all of that, the station probably needs a network printer instead. Bluetooth is at its best with one device and a printer a metre away, as in a food truck.
Network printers: find the IP address and keep it
A WiFi or Ethernet printer has an IP address on your network, and every device prints to that address. The classic Friday-night failure: the router restarts, hands the printer a new address, and every device keeps sending to the old one.
Find the printer’s IP address
Print the network status sheet. On many models it has its own button or uses the Feed button. On the Epson example’s Ethernet version, hold the status sheet button on the back for three seconds or longer with the cover closed. The sheet shows the current IP address and the printer’s MAC address. Enter that IP in your POS app’s printer settings and print a test.
One address worth knowing on that model: its default manual address is 192.168.192.168, and its WiFi version starts out of the box in a setup mode that prints that same address. If your sheet shows it while your other devices use a different range, the printer is not on your network yet.
Keep the address from changing
Reserve the address in your router: find DHCP reservation (also called static lease or address reservation) and tie the printer’s MAC address to its current IP. The buying guide has the three steps. Then restart the router once and print from every device to prove it held.
Other network causes
- Wrong network. The printer and every device that prints to it must be on the same network. A guest WiFi usually keeps devices from seeing each other. Never put the printer there.
- Cable and WiFi at once. On the Epson example, plugging in a network cable switches WiFi off.
- Interference. The same manual says to keep a WiFi printer away from kitchen microwaves and to pick a WiFi channel, or the 5 GHz band, that is free of interference.
- Settings you cannot undo. Most network printers can reset only their network settings to factory defaults. On the Epson example, hold the status sheet button while switching the printer on. Write the old settings down first.
USB printers: one cable, one computer
A USB printer is the simplest to fix because there is only one thing between it and the computer.
- Reseat the cable at both ends, and try another USB port.
- Keep the computer awake. If the laptop sleeps, the printer gets nothing. Turn sleep off for the till computer during opening hours.
- Clear the queue. On Windows, a stuck job in Printers & scanners holds up everything behind it. Cancel it and send a new test.
- Check the right printer is selected in your POS app after an update or a port change.
- iPhone and iPad: do not plan on USB printing from an iPhone or iPad. Use a network printer.
Blank, faded or garbled receipts
Blank paper
The paper feeds, the cutter cuts, and nothing is on it. Almost always the roll is in upside down, so the heat lands on the uncoated side. Turn the roll round so the coated side faces the print head, and run the self-test again.
Not sure which side is coated? Scratch the paper quickly with a fingernail. The heat-sensitive side shows a dark mark; the plain side does not. If neither side marks, it is not thermal paper.
Faint or patchy print
- Print density. Most printers have a density setting. The Epson example has seven levels and ships on the middle one, and its manual recommends matching the level to the paper you use.
- Dirty print head. Epson recommends cleaning the head about every three months: power off, let the head cool, and wipe the heating elements with a cotton swab and ethanol or isopropyl alcohol. Paper dust on the rubber roller causes uneven feeding; clean that with a swab and plain water, and let it dry before switching on.
- Old or cheap paper. Thermal paper darkens with heat and light. A roll stored above the coffee machine prints grey before it is opened.
Strange symbols or pages of code
Random characters mean the printer works but receives something it cannot read.
- Wrong printer language. A POS sends commands in a printer language such as ESC/POS. If the app or the driver is set for a different printer type, the printer prints the commands as text. Select the right printer type in the app, or a generic ESC/POS / text driver on Windows.
- Wrong character set. Accented letters, currency signs or non-Latin script come out as other symbols. The Epson example ships with code page PC437 (USA, Standard Europe) and can switch between 43 code pages and 18 international sets. Your app and the printer must agree.
- Check what is arriving. Many printers have a hexadecimal dump mode that prints exactly what they receive. On the Epson example: open the cover, hold Feed while switching on until the error light comes on, close the cover, and send a job. It tells “the app sent the wrong thing” from “the printer misread it”. Switch off to leave the mode.
Paper, cover and cutter errors
The error light is the printer telling you it has stopped on purpose. The Epson example sorts errors into three kinds, and most printers behave similarly.
Fixes itself once the cause is gone
- Cover opened while printing. Close it.
- Print head too hot. It waits for the head to cool, then carries on. If it happens every rush, move the printer away from the grill or fryer: the example model is rated for 5 to 45 °C.
Fixes itself after you clear it
- Paper out. Load a new roll and close the cover.
- Cutter jam. Open the cover, take out the jammed paper gently, and close it. Never yank paper out of the cutter.
- The cover will not open. If paper or debris has locked the cutter blade, the cover stays shut. On the Epson example, switch off, slide the cutter cover forward, and turn the knob inside until a triangle shows in the opening; that returns the blade. Then open the roll cover and take out the paper. Do not touch the print head: it can be very hot.
Needs a power cycle, then service
If the error light flashes in a pattern that the manual lists as a hardware fault (memory, voltage, internal circuit), switch the printer off. If it comes back after a restart, the printer needs repair.
Set it up right before service
- Self-test page printed and kept under the printer, with the model and interface on it.
- Network printers: IP address reserved on the router; router restarted once to prove it.
- Bluetooth printers: paired with the one device that will drive it, that device set never to sleep, and the printer within sight of it.
- USB printers: the till computer set not to sleep during opening hours.
- Test from the app on every device that prints, not just from the phone’s settings.
- Near-end warning on, where the printer has one, so the kitchen gets a warning before the roll runs out mid-ticket. On the Epson example it ships switched off.
- Two spare rolls at each station, stored cool and dark.
- Placement: away from the grill, fryer, steam and drip trays.
- A plan B: a pad at the pass so service carries on while you fix it.
If your kitchen runs from printed tickets, the kitchen order ticket guide covers what each one should show.